UnoPim revolutionizes product data management by centralizing all product information in one easy-to-use platform, ensuring consistency and accuracy across all channels.
Its seamless integration with popular e-commerce platforms like Shopify, Magento, and WordPress simplifies product data management and distribution for businesses.
UnoPim helps businesses create engaging product descriptions and marketing content, driving higher engagement and efficiency.
The open-source PIM nature of UnoPim makes it an affordable yet powerful solution for businesses of any size, providing flexibility and scalability as needs grow.
In the previous blog, we discussed the importance of setting up UnoPim using an Nginx server and its benefits. How to Setup UnoPim Using Nginx Server.
Prerequisites
- Shared Hosting with cPanel Access: Ensure you have access to your cPanel and FTP credentials.
- UnoPim Software: Download the latest UnoPim version from the official website or GitHub repository.
- PHP 8.2 or higher: Verify that your hosting environment supports the required PHP version.
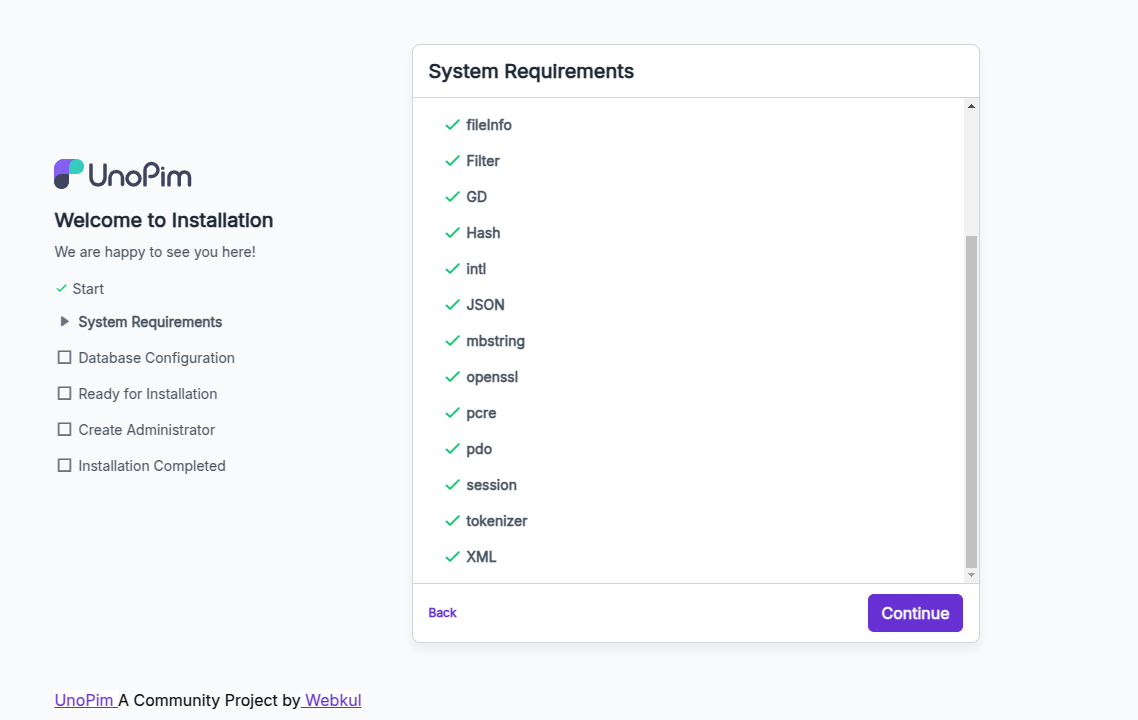
- Required PHP Extensions: cli, apcu, bcmath, curl, opcache, fpm, gd, intl, mysql, xml, zip, sodium, mbstring, imagick, libapache2-mod, fileinfo, filter, hash, json, openssl, pcre, pdo, tokenizer, session.
- Composer: 2.2.0 or higher.
- Database: MySQL 5.7 or higher, MariaDB 10.10 or higher.
- FTP Client: Use an FTP client like FileZilla or cPanel’s File Manager.
Installing Unopim on cPanel Server(Shared Hosting)
Step 1: Login into your FTP Client
- Log into cPanel: Open your browser and log into your cPanel account.
- Create a New Directory (Optional): Go to File Manager and navigate to public_html or the root folder where you’d like to install UnoPim. Optionally, create a new folder (e.g., unopim).
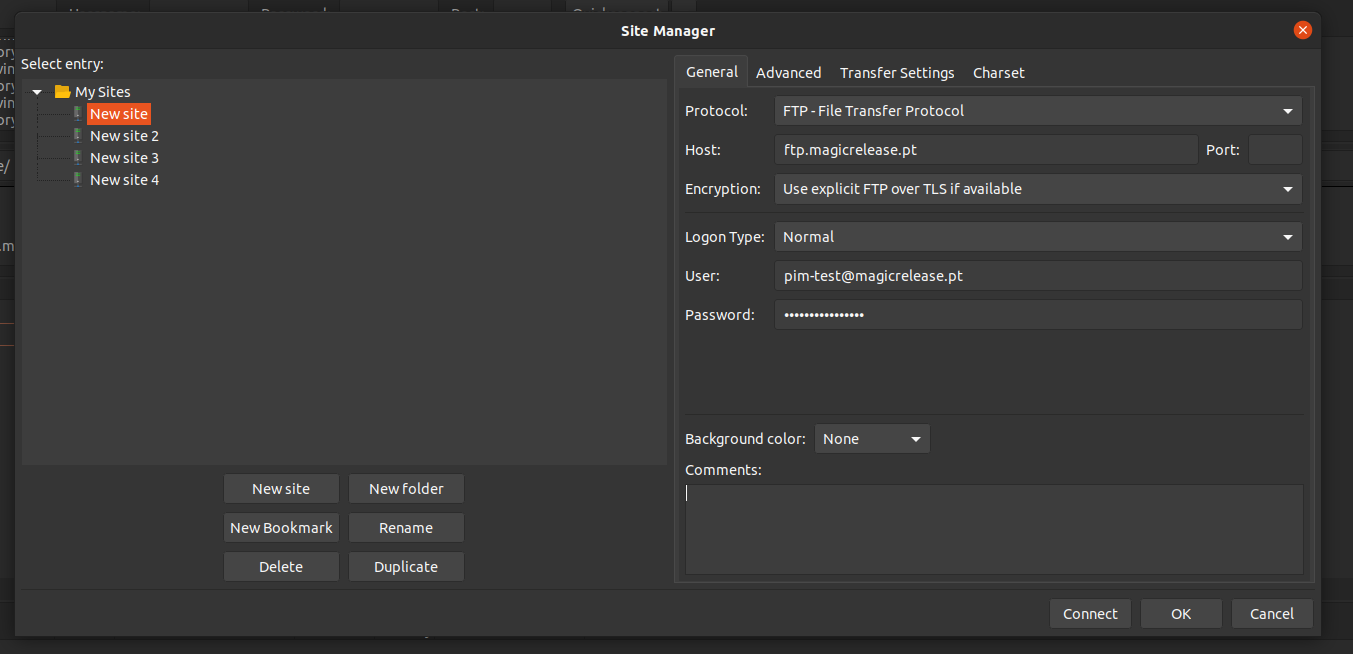
- FTP Client Setup: Open your FTP client (e.g., FileZilla), enter your FTP credentials (Host, Username, Password, Port) and connect.

Step 2: Upload UnoPim Zip file
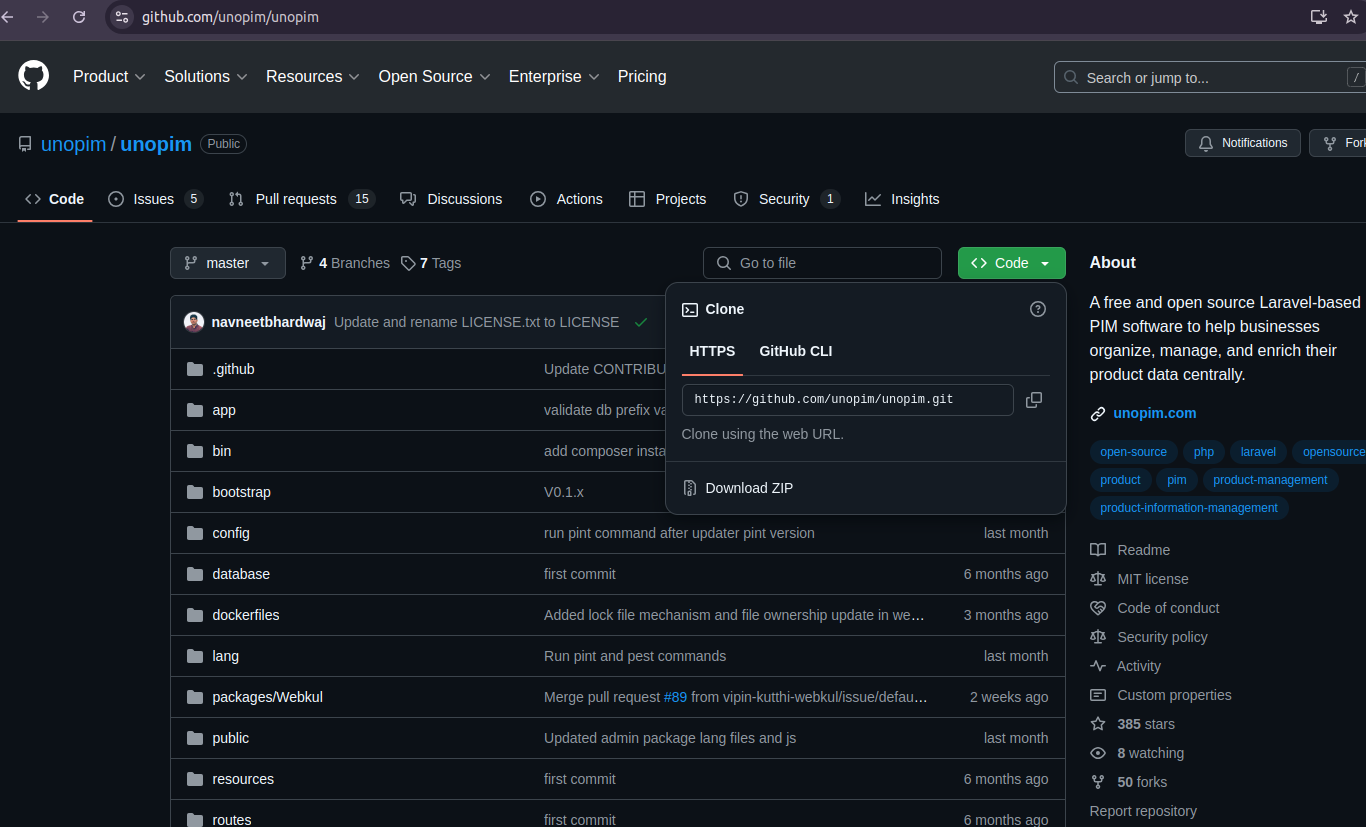
Download a zip file from the official Unopim GitHub profile – https://github.com/unopim/unopim
Upload Files: Once connected to the server via FTP, Unzip and upload the UnoPim files to the desired folder and within the unopim or your created directory.
Step 3: Set Up the Database
- Create MySQL Database: In cPanel, go to MySQL Databases. Create a new database and a new database user (with strong passwords).
- Assign Permissions: Assign the user to the newly created database with full privileges.
- Note Credentials: Save the database name, username, and password; you will need these for UnoPim’s configuration.
Step 4: Configure UnoPim
Edit Configuration File:
- Once the files are uploaded, navigate to the UnoPim directory via cPanel’s File Manager or your FTP client.
- Find the .env file (if it doesn’t exist, create it by copying .env.example).
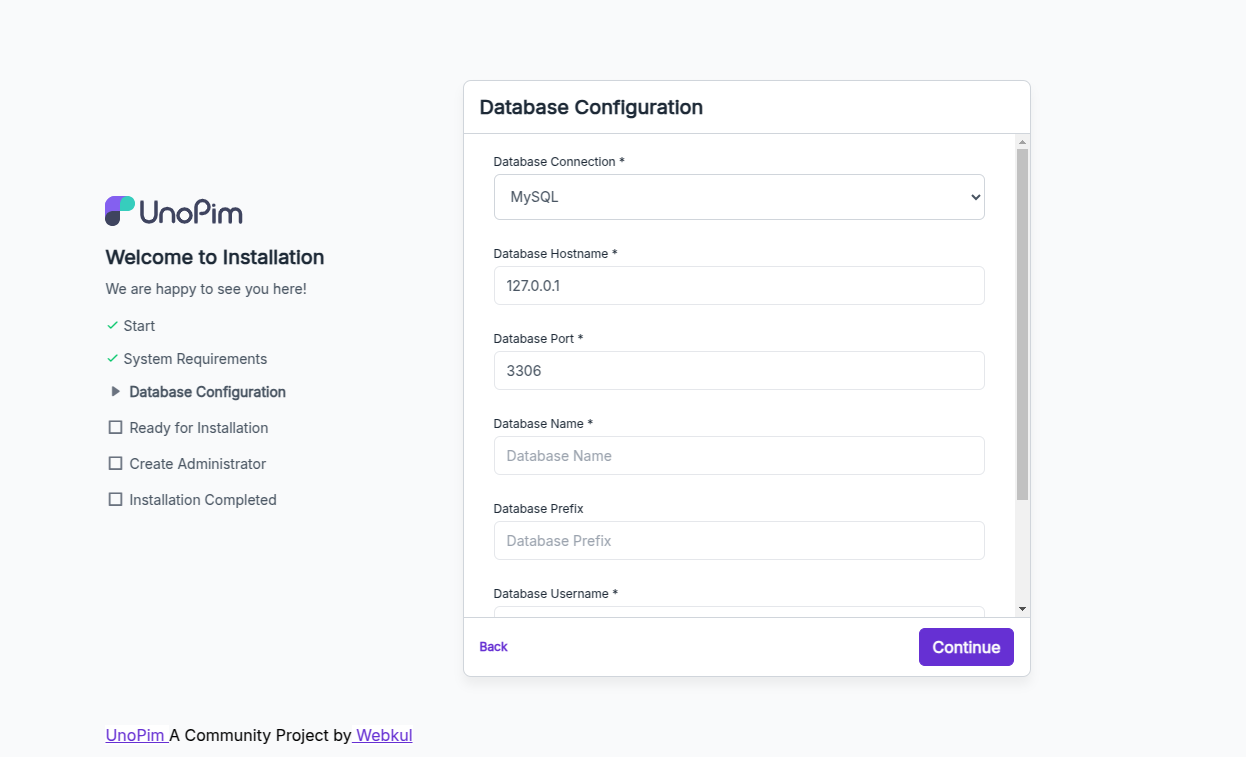
        Open the .env file for editing and configure the database settings:

        DB_CONNECTION=mysql
        DB_HOST=127.0.0.1
        DB_PORT=3306
        DB_DATABASE=your_database_name
        DB_USERNAME=your_database_username
        DB_PASSWORD=your_database_password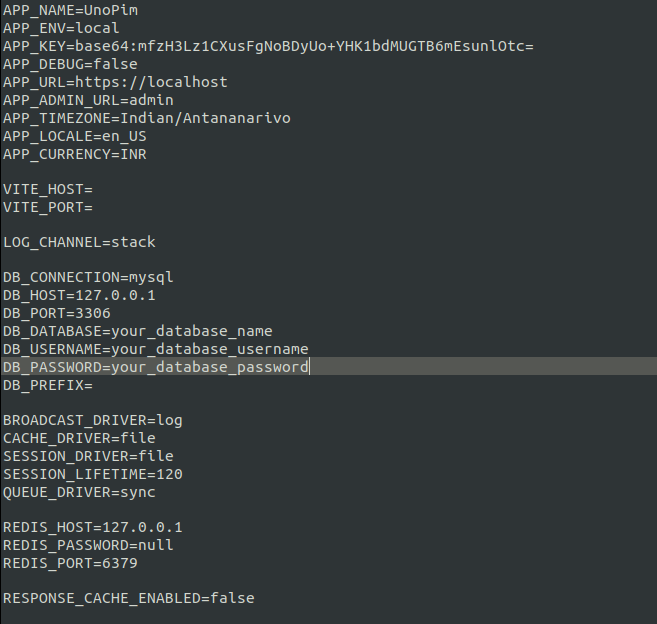
Step 5: Access the UnoPim Dashboard
- Access via Browser: Open your browser and navigate to the URL where you uploaded UnoPim (e.g., https://yourdomain.com/unopim/public).
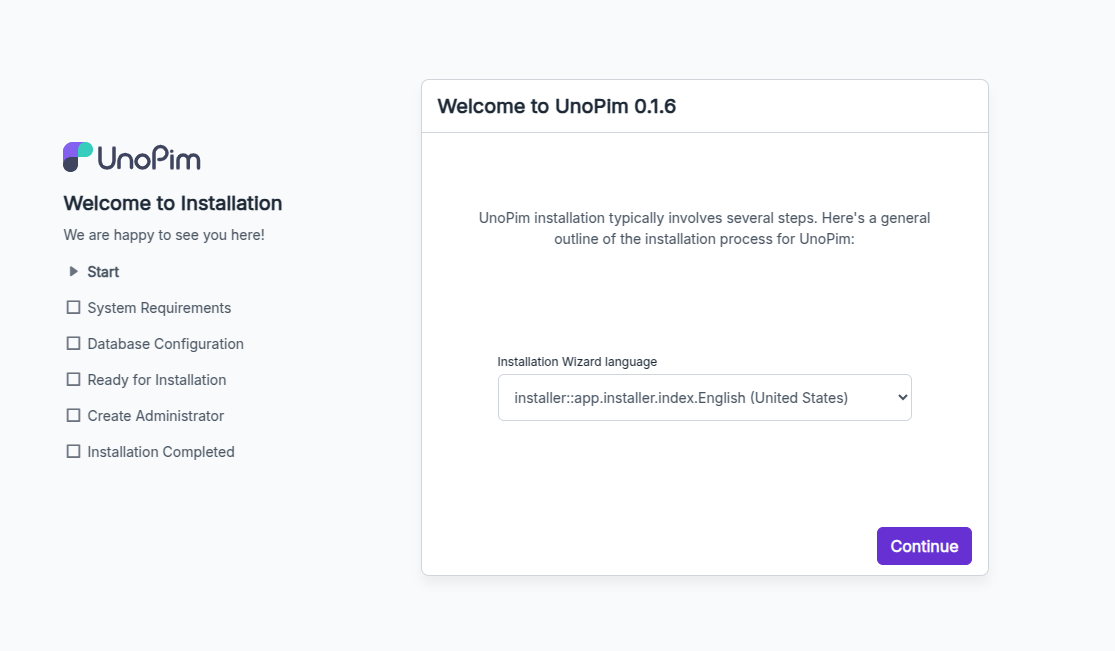
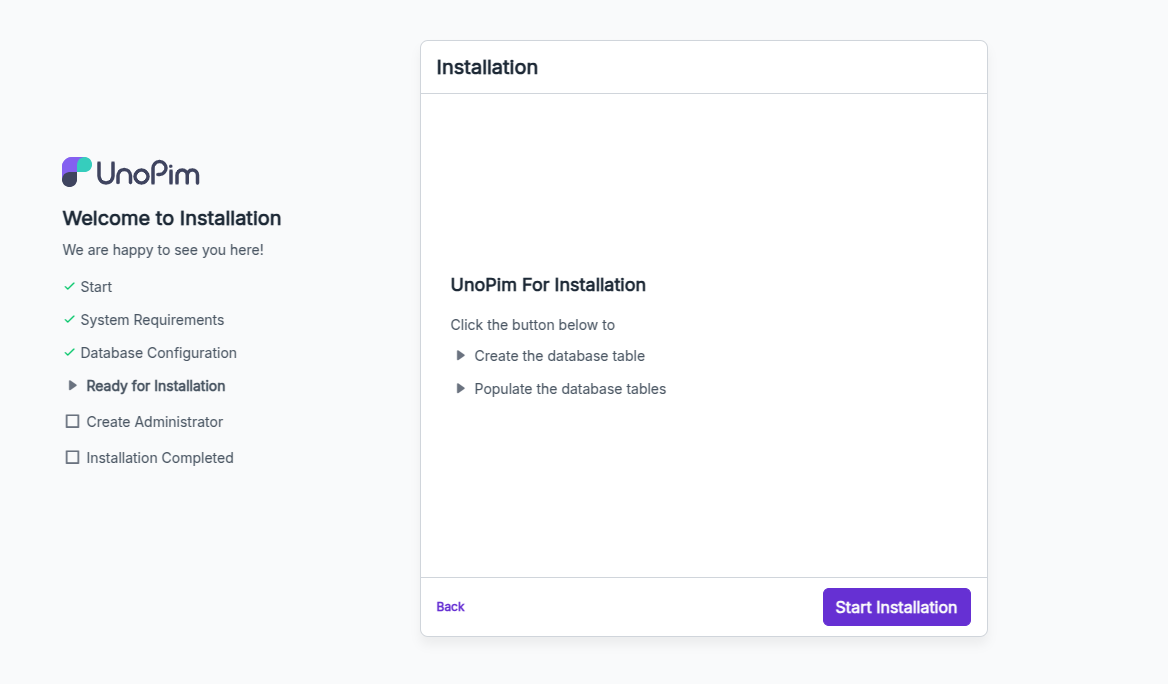
Enter the credentials of your Database and Continue
- Login: After installation. Use the default credentials or the credentials you set up during installation to access the dashboard.
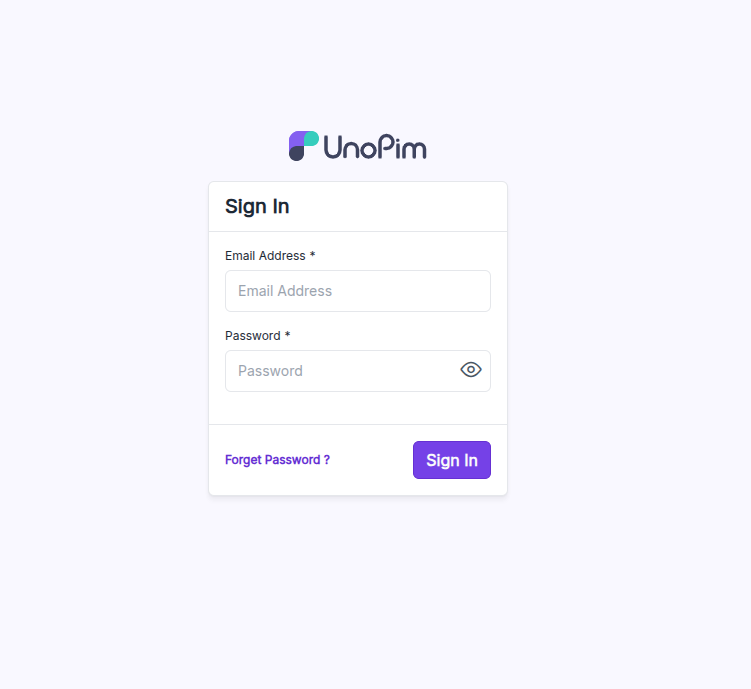
The UnoPim has been installed successfully, now you can login to your PIM using your username and password.
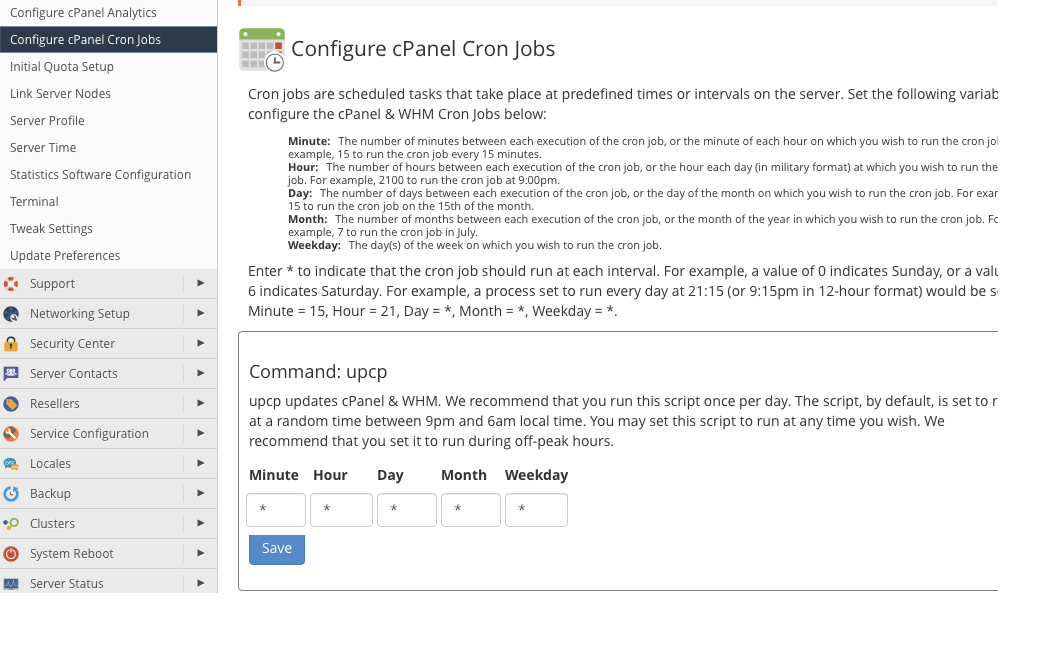
Now, Let’s discuss how we can add a Cron Job in cPanel
Steps to Add a Cron Job in cPanel:
- Log into cPanel:
- Go to your cPanel login page.
- Enter your cPanel username and password to log in.
- Navigate to the Cron Jobs Section:
- Once you’re in the cPanel dashboard, look for the “Advanced” section.
- Click on the “Configure cPanel Cron Jobs” icon.
- Add a New Cron Job:
- In the “Configure cPanel Cron jobs” section, you’ll see different options for setting the frequency of the cron job (Minute, Hour, Day, Month, Weekday). If you want to set the cron job to run every minute, you can do that by selecting:
- Minute: *
- Hour: *
- Day: *
- Month: *
- Weekday: *
This configuration means the cron job will run every minute.
4. Configure Cron Command for Queue Processing (Export/Import) in Background:
In the “Command” field, you should enter the full path to the PHP executable and the Artisan command you want to run, just like in your example:
php /home/directory/unopim/artisan queue:work --tries=3 --timeout=60 >> /dev/null 2>&1Replace /home/directory/ with your project directory. Ensure that the path is correct and that the artisan file is indeed in that directory.
5. Save the Cron Job:
Once everything is set up, save the cron job.
Need Support?
Thank You for reading this Blog!
For further more interesting blogs, keep in touch with us. If you need any kind of support, simply raise a ticket at https://webkul.uvdesk.com/en/.
For further help or queries, please contact us or raise a ticket.


Be the first to comment.