Webhook configuration in UnoPim enables real-time updates by instantly sending relevant data to external applications whenever a specific event occurs.
In this blog, we will explore how webhook configuration works in UnoPim, enabling real-time, automated communication across connected systems.
Webhook configuration delivers real-time updates, unlike manual syncs or scheduled cron jobs

For PIM users, this feature brings significant advantages:
- Faster and more accurate product updates across all channels.
- Reduced dependency on manual processes and scheduled syncs.
- Improved data consistency and reliability.
- Better integration capabilities with eCommerce, ERP, or custom systems.
- Enhanced efficiency through event-driven automation.
By the end of this guide, you will have a clear understanding of how UnoPim webhooks operate, how to configure them, and how they can enhance your overall product data management workflow.
What are Webhooks
Webhooks are automated callbacks that allow the system to instantly send data to any external application whenever a specific event occurs.
Instead of relying on periodic syncs, UnoPim “pushes” the information the moment an action takes place, such as a product being created, updated, or deleted.
This event-driven model ensures that connected platforms or custom applications always receive the latest product information without delay.
How Webhooks Work in UnoPim
The webhook mechanism in UnoPim follows a simple and efficient workflow:
- Webhook Registration – The user adds a webhook URL belonging to the external system.
- Webhook Trigger – UnoPim sends this JSON payload to the configured webhook URL via HTTP POST.
- Receiver Processing – The external system receives the data and performs the necessary actions such as updating a product record .
This entire flow runs automatically without any manual interaction, ensuring seamless and timely data updates.
Why Webhooks Matter in Product Information Management
Modern digital ecosystems require accurate, consistent, and synchronized product data across multiple channels. Webhooks play a vital role in enabling this by ensuring:
- Real-time updates instead of hourly or daily syncs
- Better data consistency across all connected systems
- Reduced operational overhead for managing integrations
- Improved automation without manual intervention
For businesses handling thousands of SKUs, webhooks significantly enhance the efficiency and reliability of product distribution across channels.
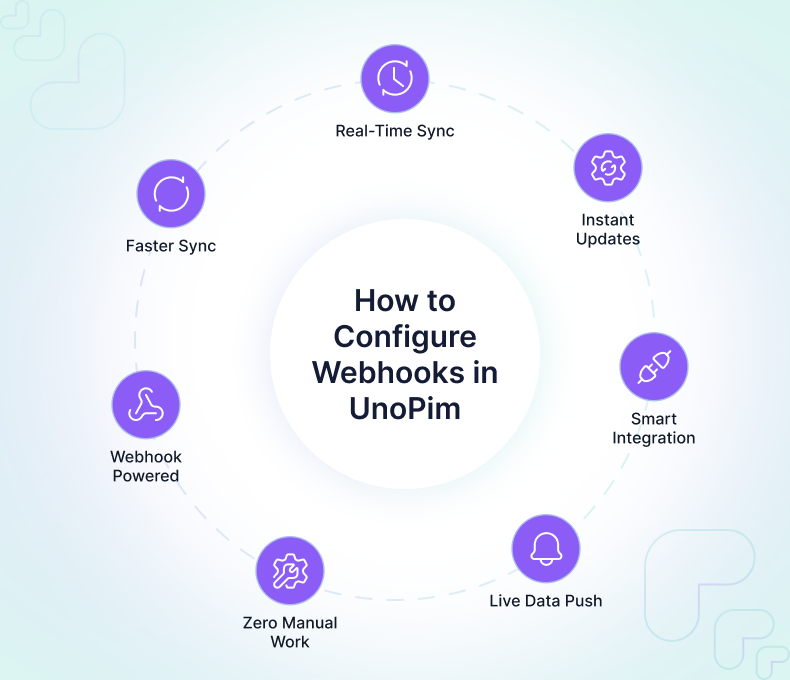
Key Benefits of Using Webhooks in UnoPim
1. Real-Time Data Synchronization
Webhooks ensure immediate delivery of product updates, enabling channels to always display up-to-date information.
2. Reduced Manual Workload
No need for teams to trigger syncs or check for updates; everything is automated behind the scenes.
3. Event-Driven Automation
Integrations become lightweight and responsive. External systems only receive data when necessary.
4. Lower System Load
Instead of frequent API polling, webhooks reduce unnecessary calls, improving performance and efficiency.
5. Faster Product Updates Across Channels
Changes to attributes’ values, prices reflect instantly across connected platforms, enhancing customer experience.
6. Better Integration Flexibility
UnoPim webhooks support custom systems, allowing developers to implement flexible, scalable workflows.
Step-by-Step Guide to Configure Webhooks in UnoPim
Follow these steps to enable and configure webhooks in UnoPim for real-time, automated data communication with external systems.
1. Prepare Webhook Endpoint
Before adding a webhook in UnoPim:
- Create an HTTPS endpoint that accepts POST requests.
- Ensure it can read JSON payloads.
- Return a proper HTTP response (
200for success).
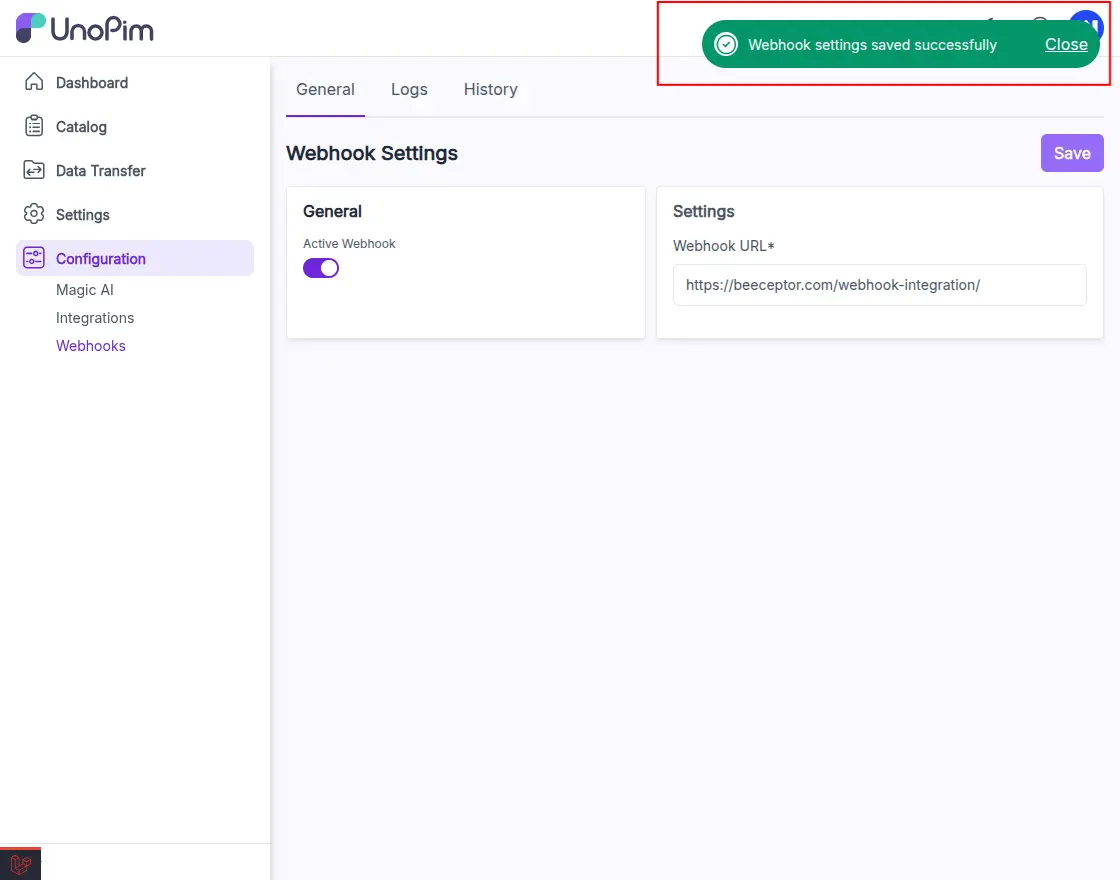
2. Add a New Webhook in UnoPim
- Log in to UnoPim Admin.
- Navigate to Configuration → Webhooks.
- In settings, Add Webhook Url.
- Enable Active status.
- Save the webhook.

3. Trigger a Webhook Event
After the webhook is configured, UnoPim will only send updates when a valid event occurs.
Currently, webhook events are triggered when:
- A product is created
- A product is updated
Once you perform a product creation or update action, UnoPim automatically sends the relevant data to the configured webhook URL.
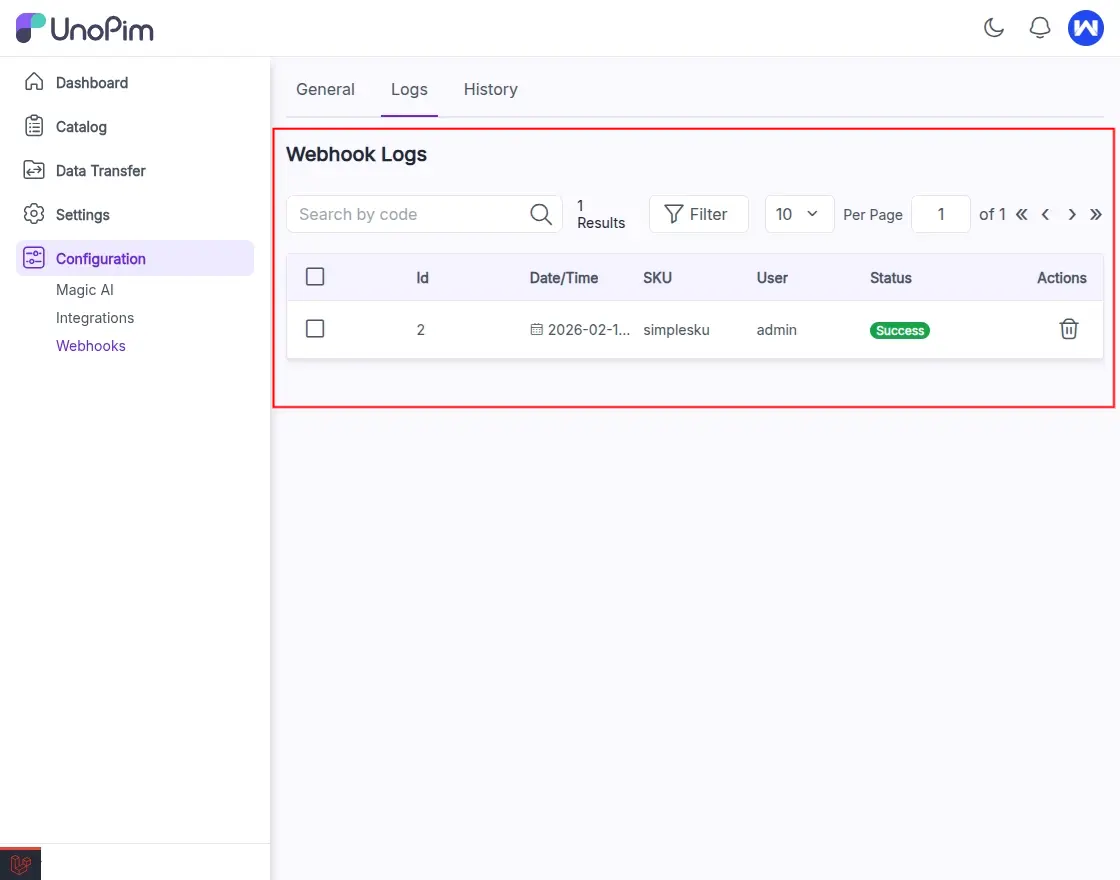
4. Monitor Delivery in Webhook Logs
UnoPim provides a dedicated log section where users can verify whether webhook calls were successfully delivered.
To view the logs:
- Navigate to Configuration → Webhooks → Logs
- Review each event entry, where you can see:
- ID
- Date/Time
- SKU
- User
- Status: Success or Failed
Failed entries can help troubleshoot issues such as authentication errors, incorrect endpoints, or server timeouts.
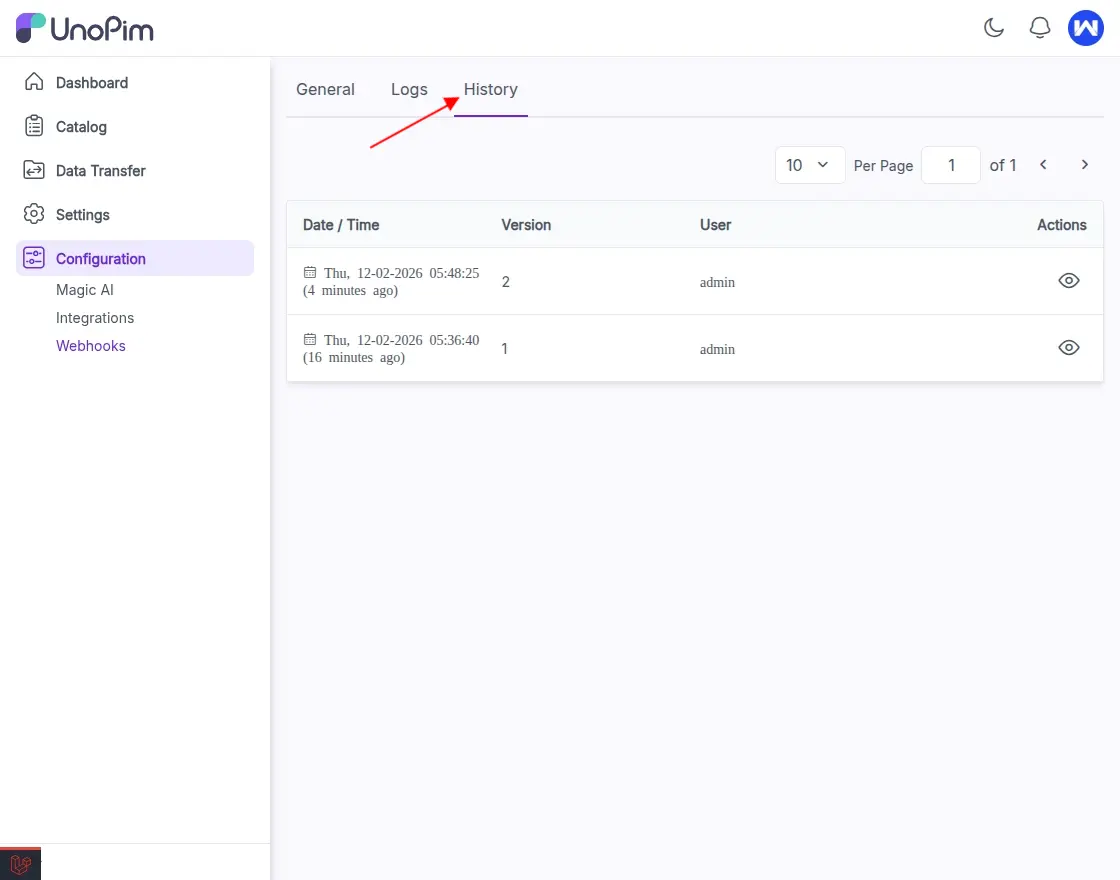
Webhook Configuration History
UnoPim also provides a detailed history log so users can track any changes made to webhook settings. From this preview window, you can review updates such as:
- Changes in webhook URL
- Status updates (enabled or disabled)
- Version history of the configuration
This ensures full transparency and helps users audit configuration changes, troubleshoot issues, or rollback if needed.
To view the History:
- Navigate to Configuration → Webhooks → History
- Click on the eye icon to view the particular changes.
Conclusion
The configuration of Webhook in UnoPim makes real-time, automated data sharing simple and efficient. By providing event-based updates and detailed logs, UnoPim ensures transparency, accuracy, and smooth communication across connected system.
Thanks for reading this blog!!
Stay Connected!! Visit our Support Portal to raise a ticket anytime.