Today, we’re going to discuss “How to Create Locales in UnoPim?”
A locale in UnoPim defines a user’s language and region, combining a language code with a country code, such as en_US for American English.
Locales are essential for managing product translations within the interface and play a key role in the PIM system.
They allow you to assign attribute values that vary by locale, enabling the use of a single description attribute that updates based on the selected locale.
This simplifies data management and improves localization across your eCommerce channels.
Setting Locales in UnoPim: Step-by-Step Guide
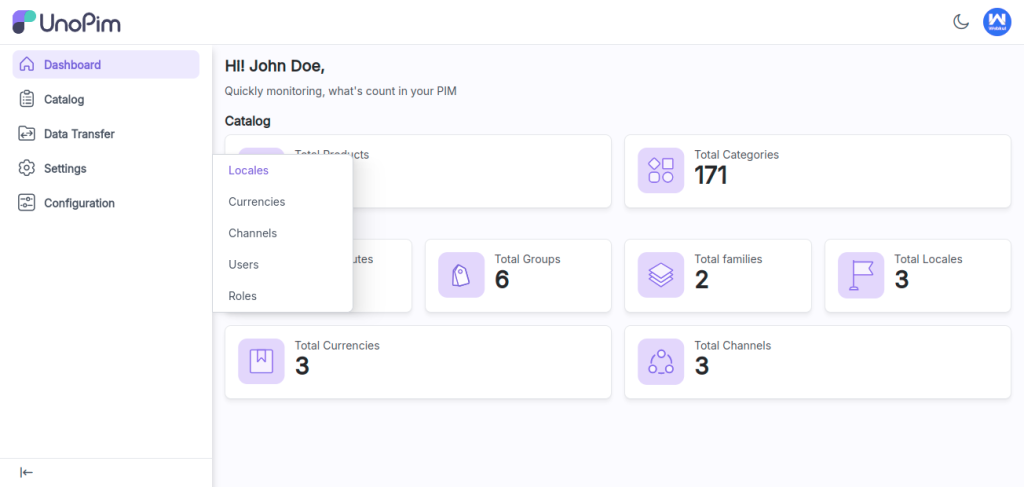
Once you log in to your open source PIM software dashboard, navigate to Settings and click on Locales to create locales in UnoPim.
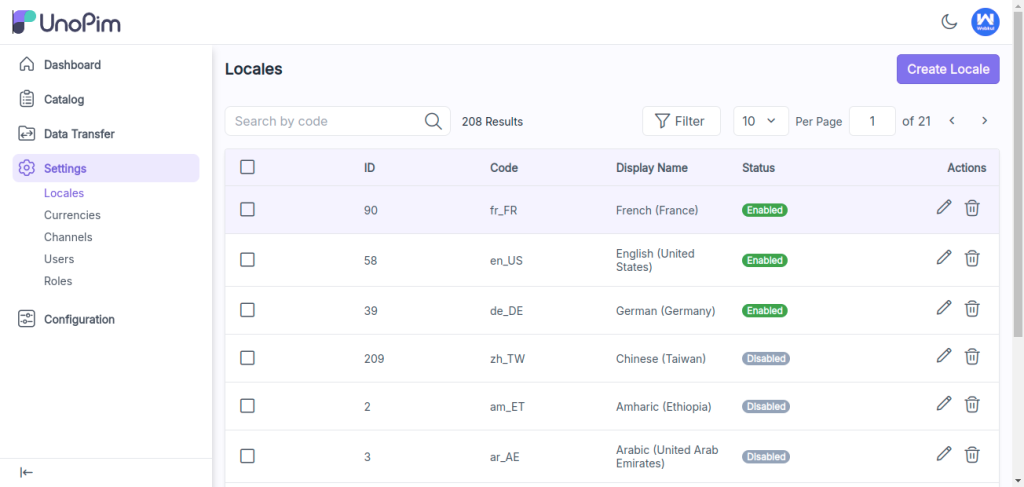
After clicking on Locales, you’ll see all the locales already added in your PIM software. To create a new locale, click the “Create Locale” button.
After that you need to fill in these basic fields:
Code: Each language has a unique code based on its country. Enter the code for the locale you want to add.
Status: Choose whether to enable or disable the locale.’
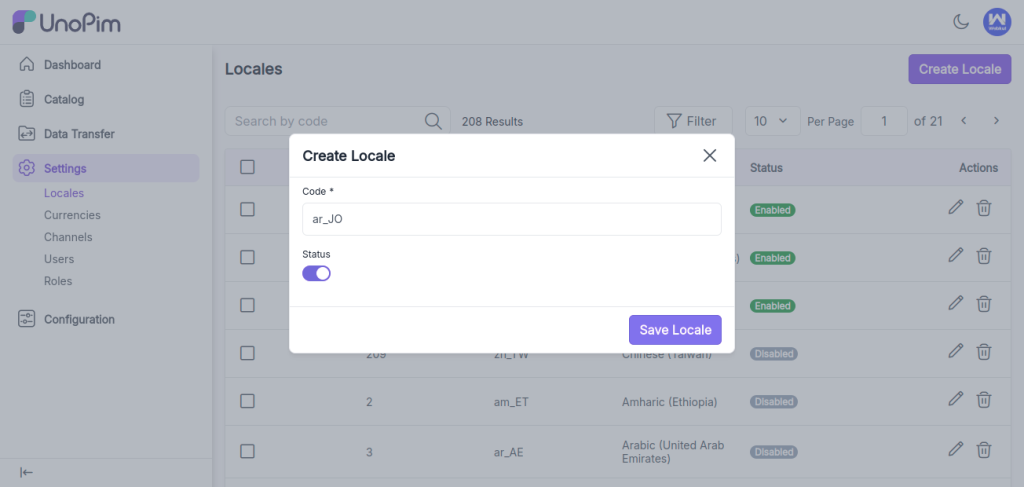
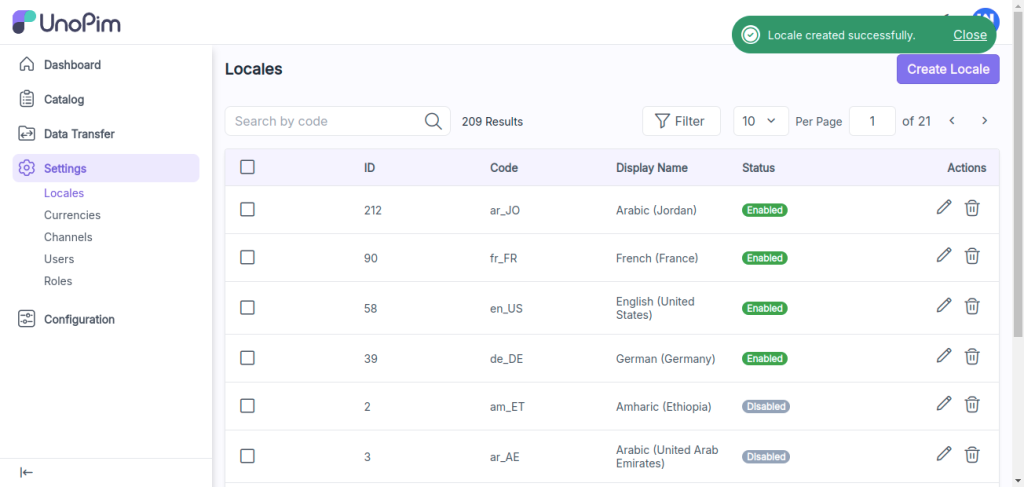
After filling in the required fields, click the “Save Locale” button. You will see a notification confirming that your new locale has been created successfully.
You can verify this in the grid displaying your locales.
After adding the locale, you can assign it to channels. Go to Settings and click on channels.
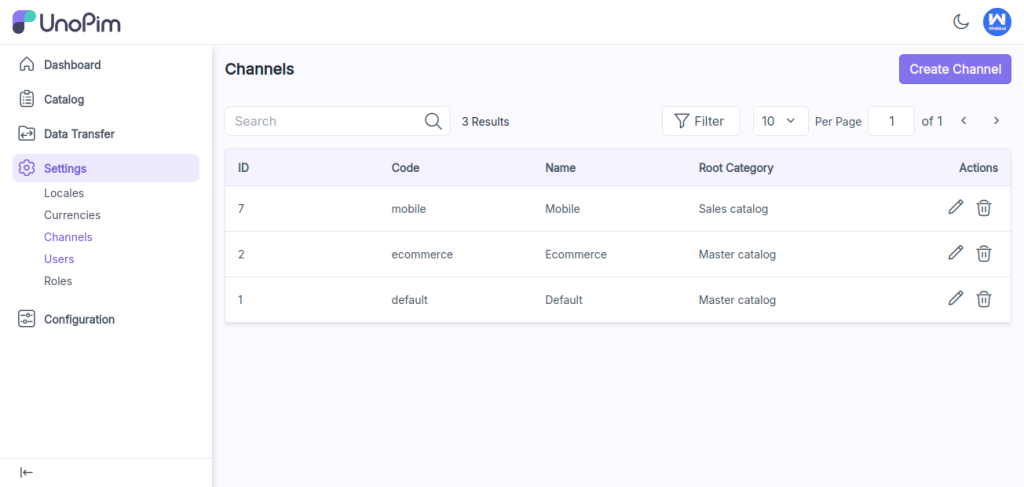
Here, you’ll see a drop down menu where you can find your new locale.
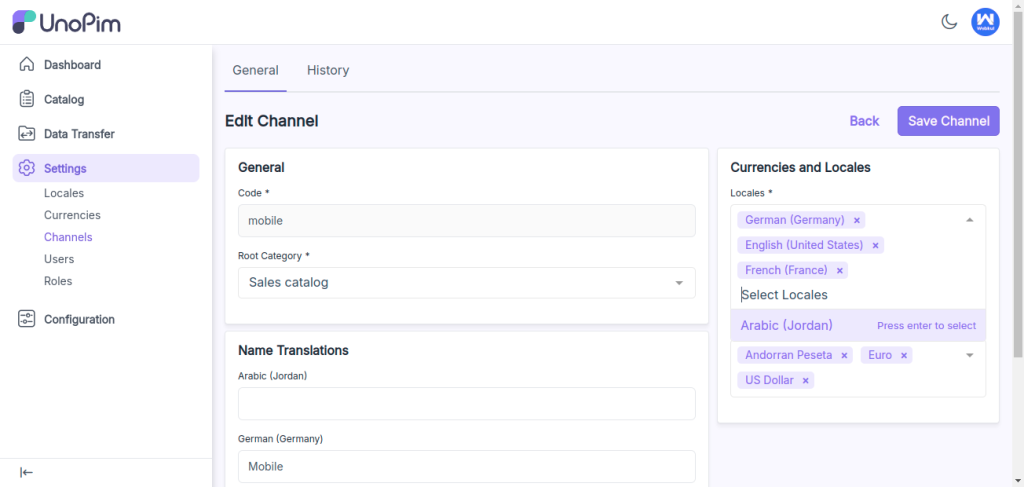
Then click on the save button to update the changes in the channel.
If you want to learn more about creating currencies, check out “How to Create Currencies in UnoPim.”
Now, your new locale will show up in the locale switcher on the product edit page. When you change the locale, the product details will update to match that specific locale.
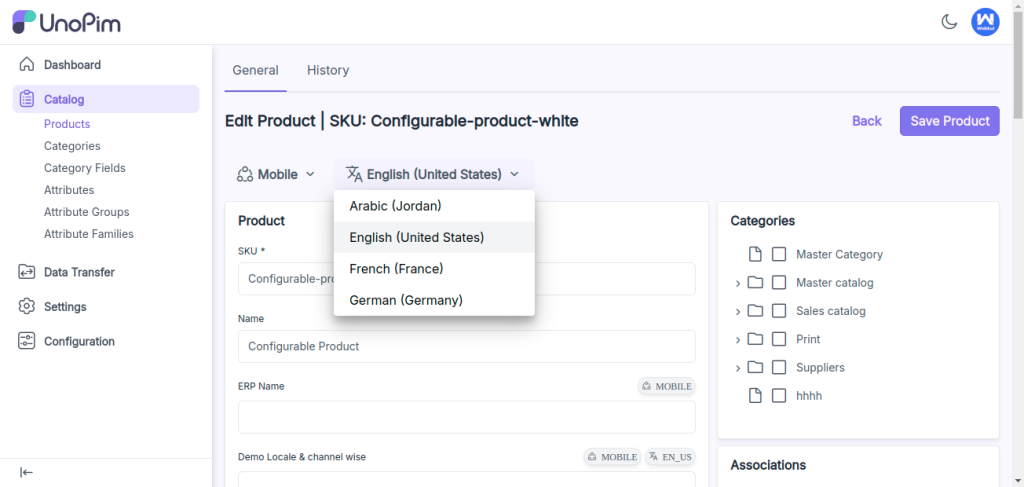
By following these steps, you can easily create and manage locales in UnoPim, making sure your product information is accurate for different locales.
Hope this helps! If you encounter any issues, feel free to submit a ticket at our Support Portal.


Be the first to comment.