Installing UnoPim Using the GUI Installer: A Step-by-Step Guide
Setting up a powerful Product Information Management (PIM) system shouldn’t require command-line expertise or lengthy manuals.
UnoPim’s GUI installer offers an intuitive, streamlined experience designed for users of all skill levels.
In this guide, you’ll discover how to get UnoPim up and running on your machine quickly—no terminal commands required.
Why Choose the GUI Installer?
- User-Friendly: Eliminates the need for technical setup and shell commands.
- Fast and Guided: Step-by-step instructions keep you on track.
- Automated Checks: Ensures your environment meets all requirements before installation.
- Professional Polish: A welcoming first experience, matching UnoPim’s visual brand.
Prerequisites
Before starting, ensure you have:
- A compatible operating system (Windows, macOS, or supported Linux distribution)
- Administrator rights on your computer
- Internet connectivity to download UnoPim and dependencies
Step 1: Download UnoPim
Download the latest version of UnoPim as a.zip package from the official source.
Step 2: Extract the Files
Unzip the package to your desired web-accessible directory (e.g., htdocs, www, or your local project folder).
Step 3: Navigate to the Project Directory
Open your terminal and move into the extracted UnoPim directory:
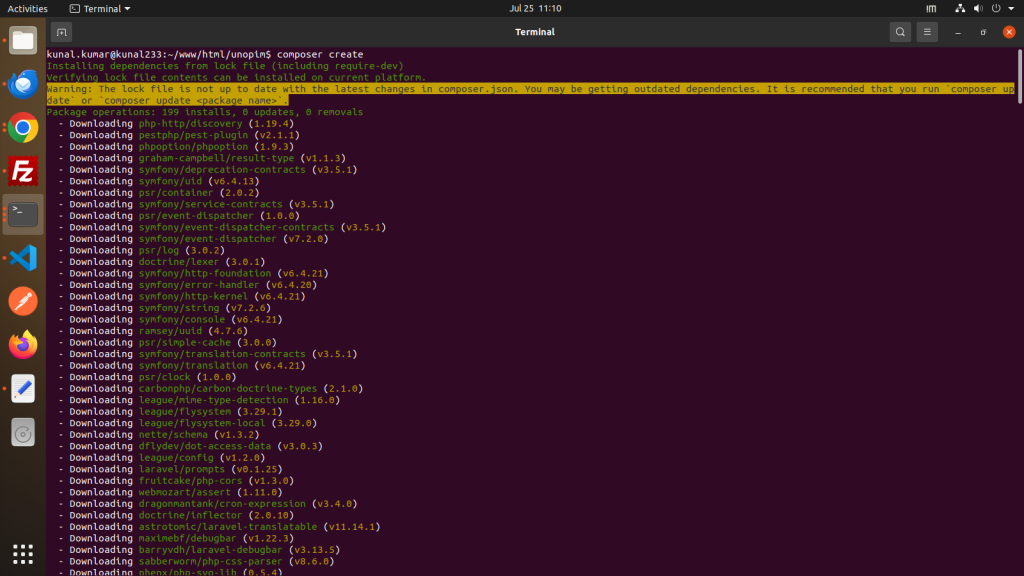
cd path-to-your-unopim-directoryStep 4: Install Dependencies
Make sure Composer is installed on your machine before running this command.
composer create

Step 5: Set the Web Server Document Root
Point your HTTP server (Apache, Nginx, etc.) to the public/ directory inside the UnoPim project folder.
Example
/path-to-unopim/public
Step 6: Open the GUI Installer
In your browser, navigate to the domain or local URL you’ve configured (e.g., http://localhost/unopim/public).
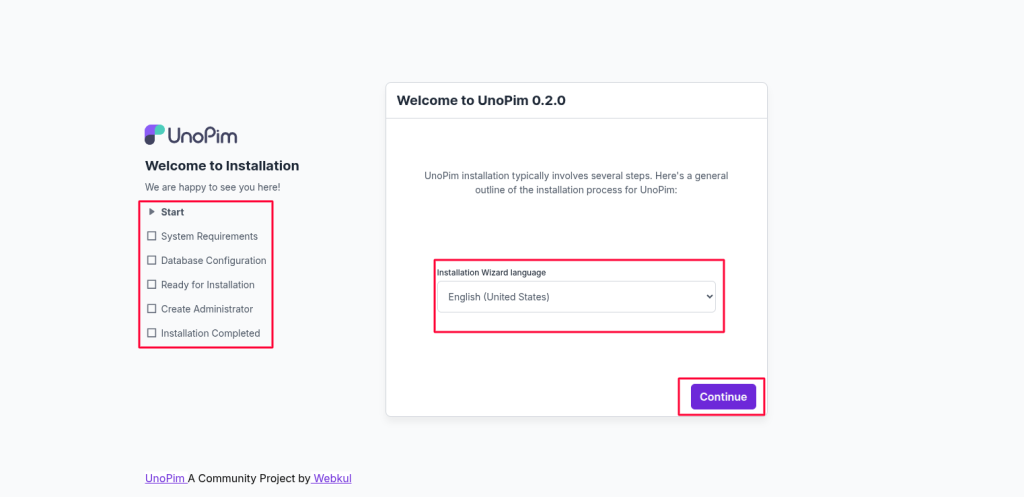
This will automatically launch the UnoPim GUI Installer.
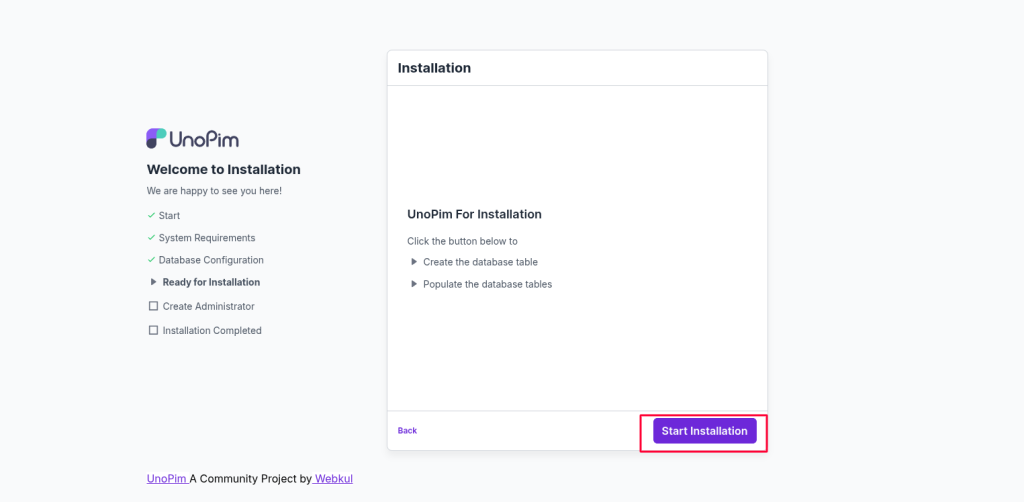
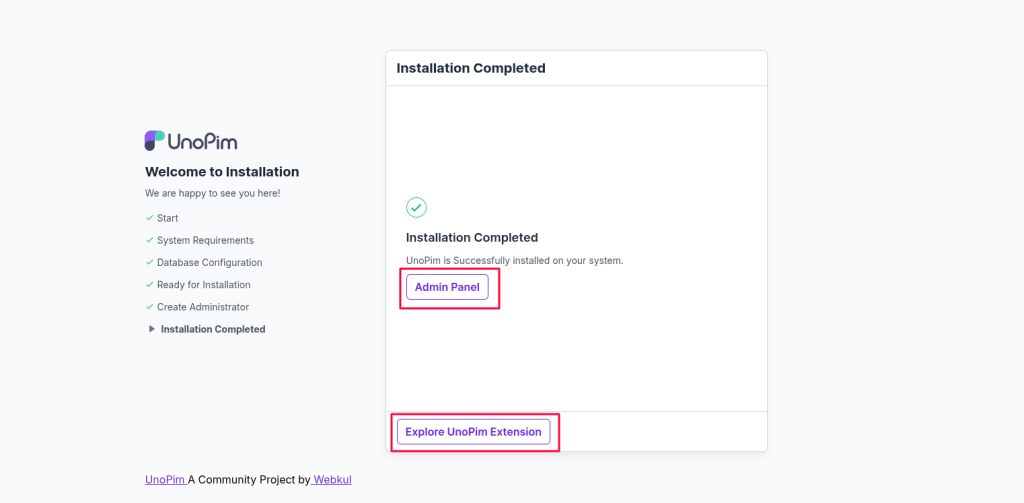
Step 7: Complete the Installation Steps
- Checking for Dependencies
- Select Installation Language
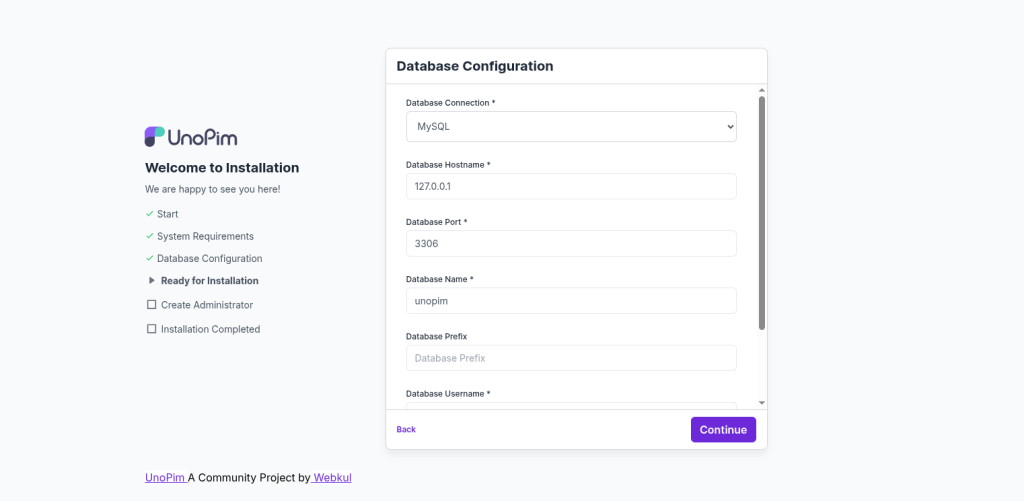
- Database Configuration
- Create Administrator
- Access the Admin Panel
Click Next or Continue as you progress through each screen.


Troubleshooting and Support
If you encounter any problems:
- Ensure all prerequisites are installed (the installer usually guides you).
- Review the installer error messages for hints.
- Visit the UnoPim help center or community forum for frequently asked questions and support contact information.
Key Benefits of Using the GUI Installer
| Feature | Benefit |
|---|---|
| Automated Checks | No manual environment setup required |
| Guided Input | No .env or config file editing |
| Visual Progress | See each step as it happens |
| Error Handling | Clear guidance for any issues |
| Branded Experience | Professional, confidence-inspiring |
Final Thoughts
UnoPim’s GUI installer removes the barriers to getting started, allowing you to focus on managing your product information—without wrestling with technical setup.
Enjoy an efficient installation process and get ready to harness UnoPim’s full potential right out of the box.
Need help? Consult the UnoPim documentation or reach out to the support team for additional guidance.
Hope this helps! If you encounter any issues, feel free to submit a ticket at our Support Portal.